
Shuffleboard Court Construction in Ontario: Getting the Base and Surface Right
Shuffleboard keeps coming up in a way it did not five years ago. CrowAll’s product line has always listed it alongside basketball, bocce, roller hockey, pickleball, and volleyball courts, but for most of that time it was the request nobody actually made. That has changed. Retirement communities want a shuffleboard court next to their existing pickleball courts because residents already play both. Condo boards and community centres are adding one as a low-impact, easy-to-learn amenity that works for a much wider age range than most sports. Homeowners with a long side yard or a strip along a driveway are asking for one specifically because it fits where a full tennis or pickleball court never would.
Shuffleboard is also a court almost everyone assumes they can build themselves, and in a narrow sense that is true. Search around and you will find plenty of guides built around a bag of ready-mix concrete, a homemade wood form, and a weekend. Some of those projects turn out fine. What tends to go wrong is everything underneath the surface: a subgrade that was never properly compacted, a slab poured without enough fall to shed water, or a finish coat applied over concrete that had not cured long enough to hold it. None of that shows up on day one. It shows up two winters later, when a section of the slab has heaved, or the acrylic coating has started lifting at the edges. This guide walks through what a professionally built shuffleboard court actually involves in Ontario, from dimensions and surface choice through the construction sequence, cost drivers, permits, and long-term care.
Why Shuffleboard Court Construction in Ontario Is Different From a Weekend Kit
A shuffleboard court is, geometrically, one of the simplest sports surfaces there is: a long, narrow, dead-flat rectangle with painted zones at each end. That simplicity is exactly why it gets underestimated. There is no net, no fencing system, no complicated line layout the way a tennis court has. What a shuffleboard court does demand, more than almost any other surface CrowAll builds, is a subgrade and slab that stay level and true for decades, because there is so little width to hide a mistake in. A tennis court that settles half an inch over ten years is rarely noticeable during play. A shuffleboard court that settles the same half inch across its six-foot width will visibly throw off every disc that crosses that spot.
Ontario’s climate makes that tolerance even less forgiving. The same freeze-thaw cycle that CrowAll accounts for on every backyard volleyball court or bocce court we build applies here too, and arguably matters more here, because a shuffleboard court has less surface area per linear foot to absorb an uneven frost heave without it becoming obvious. A concrete slab poured on an improperly compacted base, or without adequate drainage underneath it, is the single most common reason a DIY shuffleboard court starts cracking or heaving within a few winters.
Who Is Actually Building These in Ontario
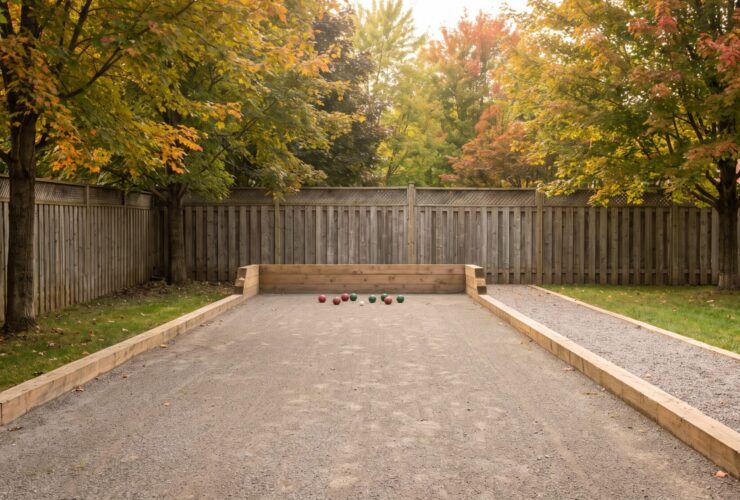
The requests CrowAll gets break down into a few consistent groups. Retirement residences and adult lifestyle communities, often adding a court next to existing pickleball or bocce courts, because the same residents tend to play more than one. Condo and HOA amenity spaces looking for something with almost no learning curve. Homeowners with an oddly shaped side yard, a long strip beside a driveway, or a laneway that is not wide enough for much else. And clubs or multi-sport facilities rounding out a property that already has a multi-sport court or several other surfaces, adding shuffleboard as a lower-intensity option for members who want something social rather than competitive. If bocce is on the list, our bocce court dimensions guide shows how much room it takes.
Shuffleboard Court Dimensions and Layout
Regulation shuffleboard courts follow specifications set out by the National Shuffleboard Association’s official rules, which define a playing surface of 6 feet wide by 40 feet long as the universal scoring zone across every recognized court size, with the overall footprint (including shooting areas, borders, and walkways) running anywhere from 6 feet by 40 feet on the smallest layout up to 10 feet by 52 feet on the largest. Very few residential properties need, or have room for, the full 10-by-52 layout, so most backyard and community builds land toward the smaller end of that range, or below it entirely on a compact court sized to fit the available yard.
| Court Type | Overall Width | Overall Length | Best Suited For |
|---|---|---|---|
| Full regulation, wide walkway | 10 ft | 52 ft | Clubs, retirement communities, tournament-style play |
| Regulation, narrow walkway | 8 ft | 52 ft | Community centres, condo amenity courts |
| Standard residential | 6 ft 4 in | 52 ft 4 in | Larger backyards, most full-length builds |
| Compact residential | 6 ft 4 in | 40 ft 4 in | Standard suburban backyards, side yards |
| Minimum playable | 3 ft | 28 ft | Tight urban lots, laneway houses, narrow side yards |
Whichever size fits the property, the 6-by-40-foot green scoring zone stays constant across every recognized court, which is what actually determines whether a shuffleboard disc travels and scores the way it should. Shrinking that zone changes the game noticeably, so a build that has room for the full 40-foot length is worth prioritizing over a shorter court, even if it means giving up some walkway width around the edges.
Court Orientation and Site Selection
Orientation matters more on a shuffleboard court than most homeowners expect going in. Running the long axis north-south keeps low afternoon sun from shining directly down the length of the court into a player’s eyes at the exact moment they are lining up a shot, which is a bigger problem on shuffleboard than on most sports, given that players stand at one end and look straight down the full 40 feet. It also helps snow and ice melt off evenly through an Ontario winter rather than leaving one long edge permanently shaded and icy while the rest of the court clears.
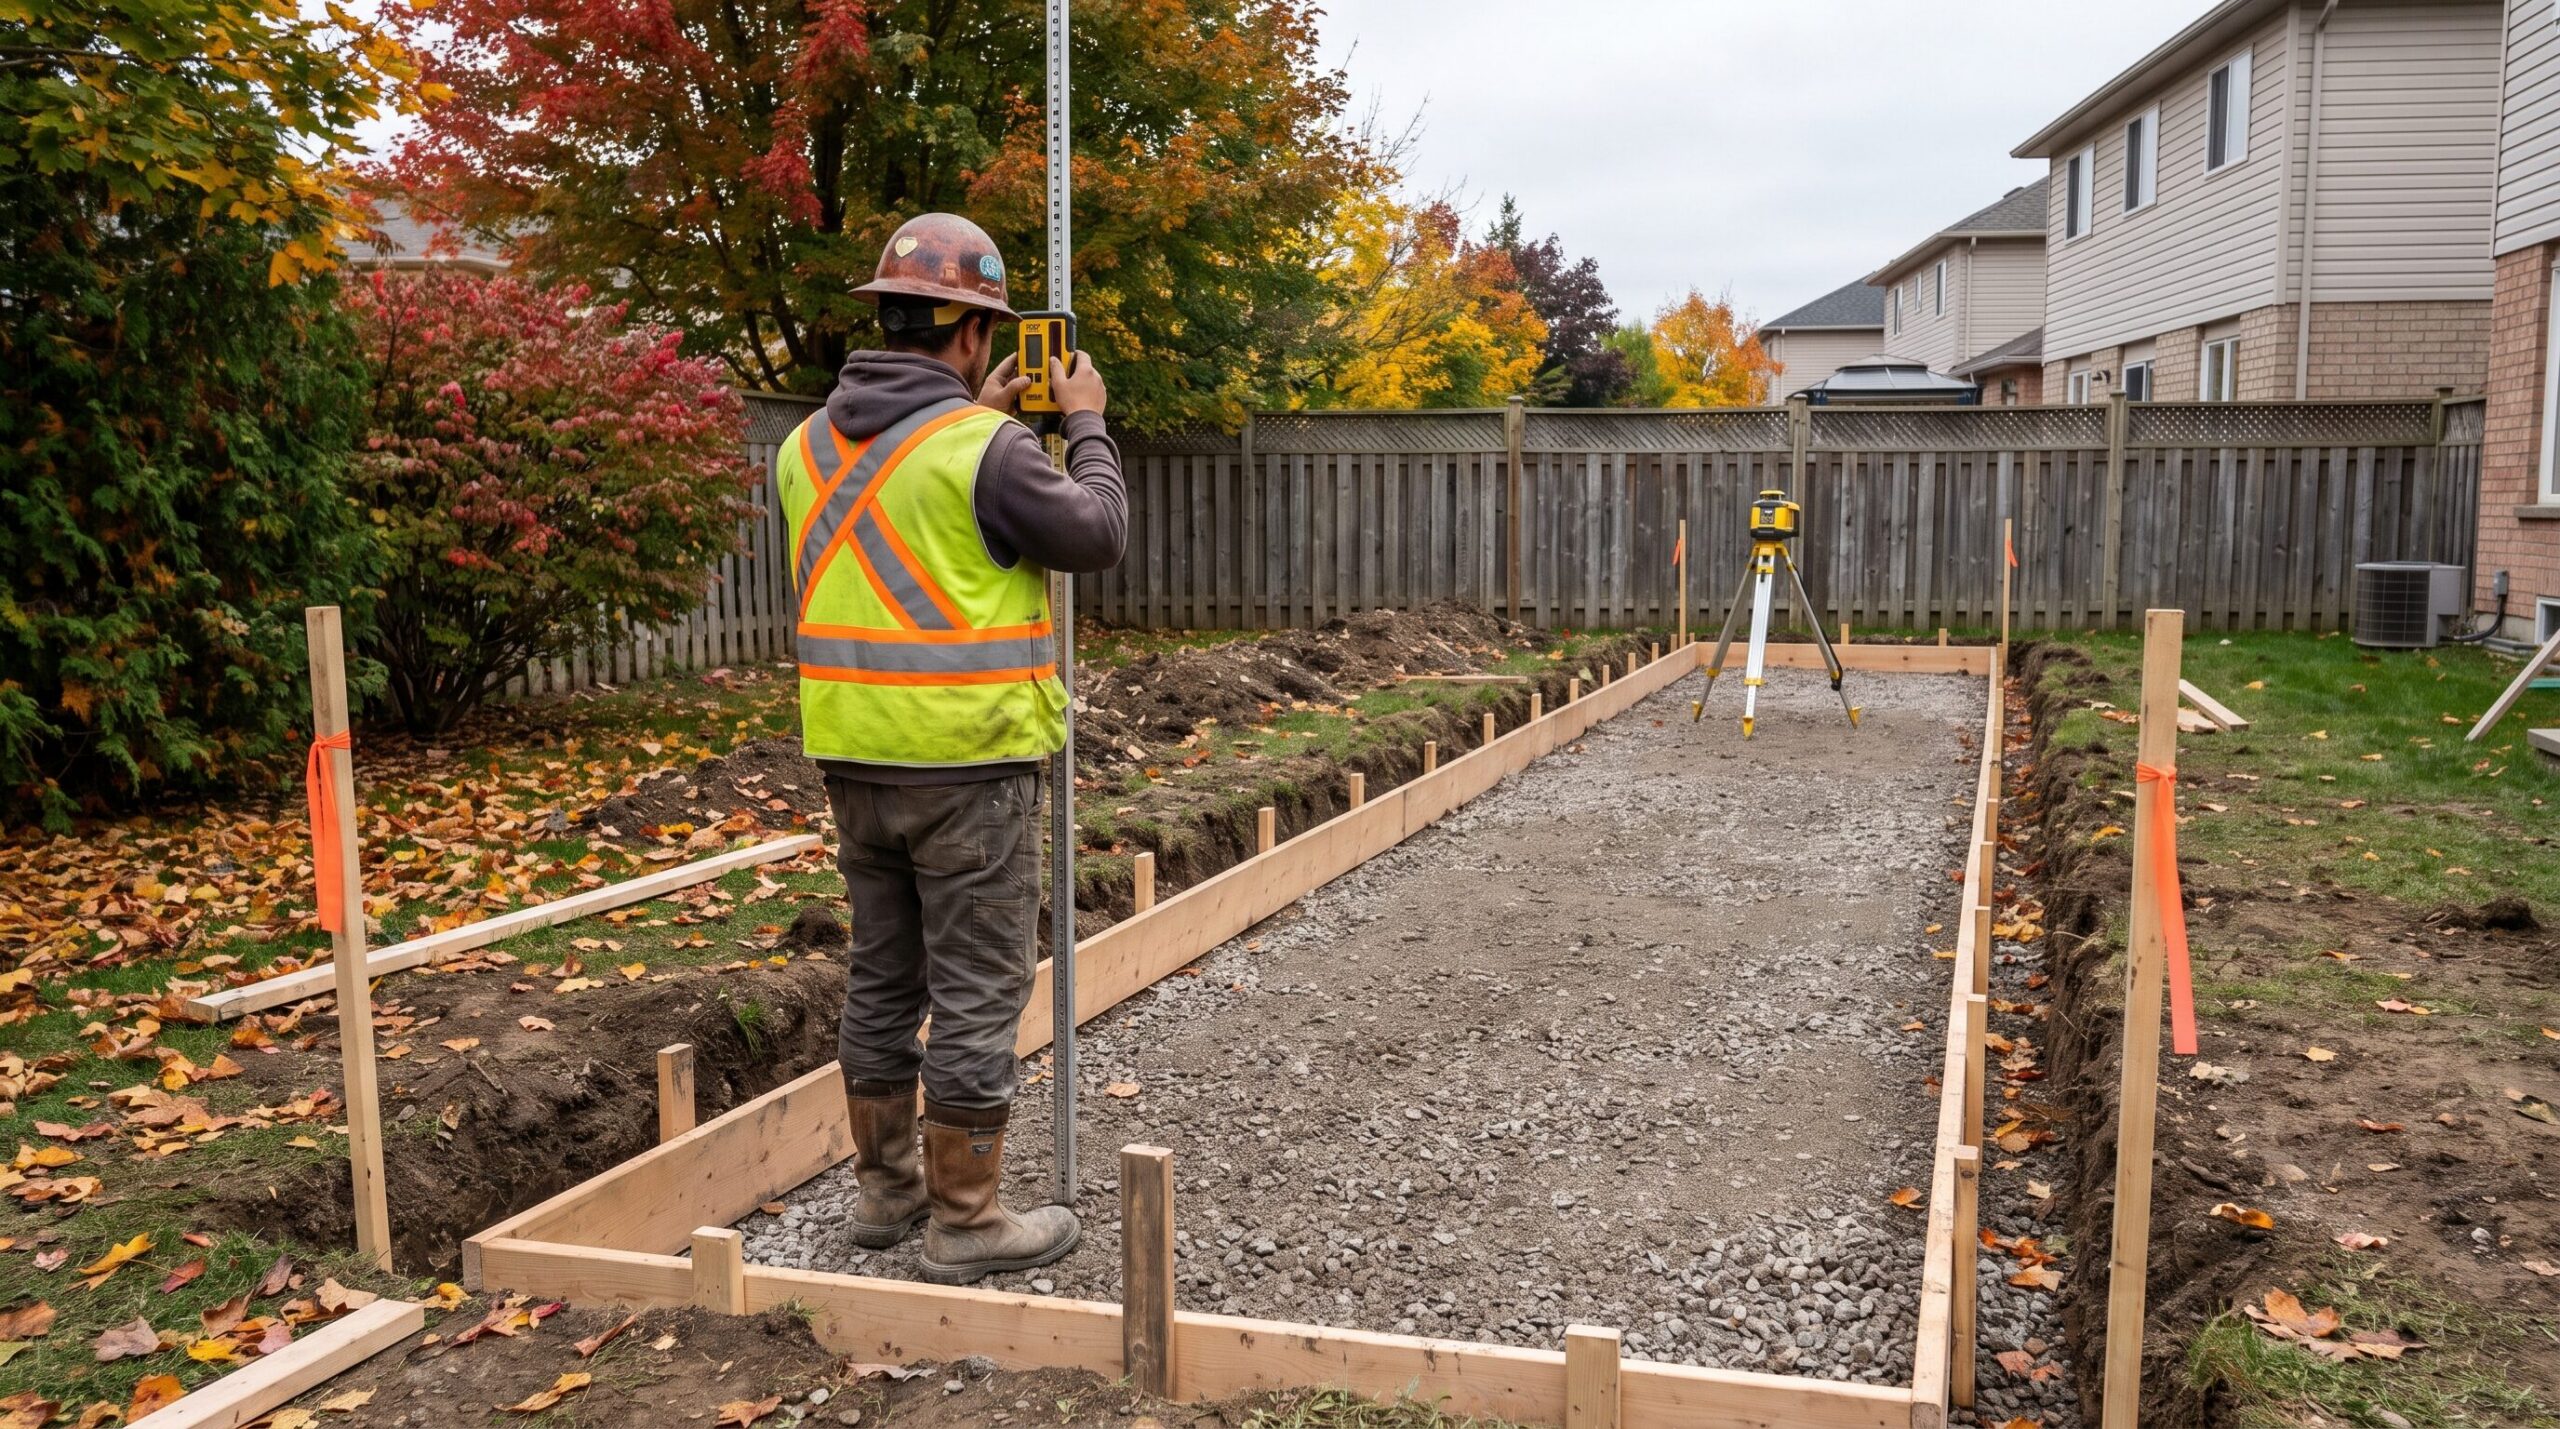
Flat, open ground is the ideal starting point, though almost no residential lot is naturally level enough to skip grading. What actually matters is that the site can be graded to a slight, consistent cross-slope, typically around 1 percent, so water sheets evenly off the surface rather than pooling in one spot. CrowAll’s laser-guided grading process sets that finished grade before any base material or forms go in, which matters even more on a court this narrow, where there is so little width to hide an inconsistency once the slab is poured.
Clearance Space and Multi-Court Layouts
Beyond the 40 or 52 feet of playing surface, plan for roughly 3 to 5 feet of clearance at each end for players to stand and retrieve discs, plus enough side clearance that a stray disc does not end up in a flower bed or against a fence. Facilities building shuffleboard next to other amenities, such as a pickleball court or a basketball court, benefit from planning the whole footprint at once rather than fitting shuffleboard into whatever strip of yard is left over once the other courts are laid out. A shared landscape plan also makes it easier to route drainage and pathways between courts rather than treating each surface as its own isolated project.
Base and Slab Construction
The base is where a shuffleboard court is won or lost, and it is also where the gap between a DIY build and a professionally engineered one shows up fastest. The National Shuffleboard Association’s construction specifications call for a 4-inch concrete slab built in two layers, roughly 3.5 inches of structural concrete reinforced with steel rod, topped with a thinner finish coat, and a surface tolerance of no more than 1/32 of an inch out of level across the full 6-foot width. That tolerance is the detail most DIY pours miss. Hitting it requires the concrete to be screeded, floated, and finished with a precision that a weekend project rarely achieves without the right forms, screed rails, and finishing tools.
Excavation and Sub-Base Preparation
Construction starts the same way it does on any hard-surface court: excavating to remove topsoil and any organic material, since concrete poured over unstable or organic soil will settle unevenly no matter how well the pour itself goes. A compacted layer of granular base material goes down next, typically several inches of crushed stone or gravel compacted in lifts, giving the slab a stable, well-draining foundation rather than resting directly on native soil. Our overview of drainage in sports surface construction covers why this step gets skipped so often on DIY builds, and why skipping it is the single biggest reason concrete court surfaces crack or heave within a few Ontario winters.
Forming, Reinforcement, and the Pour
Wood or metal forms establish the exact court dimensions before concrete goes in, and getting those forms square and true matters enormously on a court this long and narrow, because even a slight bow in a 40 or 52-foot form telegraphs straight into the finished slab. Steel reinforcement, typically rod running the length of the court with cross-rod on a regular grid, ties the slab together and helps it move as one piece through freeze-thaw cycles rather than cracking at a weak point. Concrete is placed, screeded level across the forms, and floated to a smooth, dense finish, since any texture left in the base concrete will telegraph through a thin acrylic coating later.
Curing Before Coating
New concrete needs roughly three to four weeks to cure to sufficient strength before it is ready for an acrylic coating system, and rushing that step is one of the more common mistakes on faster DIY timelines. Coating a slab too early traps residual moisture under the finish, which shows up later as bubbling, peeling, or a coating that never fully bonds to the concrete underneath. A properly sequenced build accounts for that curing window from the start, rather than treating it as a delay to work around.
Choosing a Shuffleboard Court Surface
Nearly every shuffleboard court, whether built for a retirement community, a club, or a backyard, uses some version of a hard, smooth, coated surface, because that is what lets a disc glide consistently rather than catching or dragging. Within that, there is still real variation in how the surface gets built and finished.
Poured Concrete With Acrylic Coating
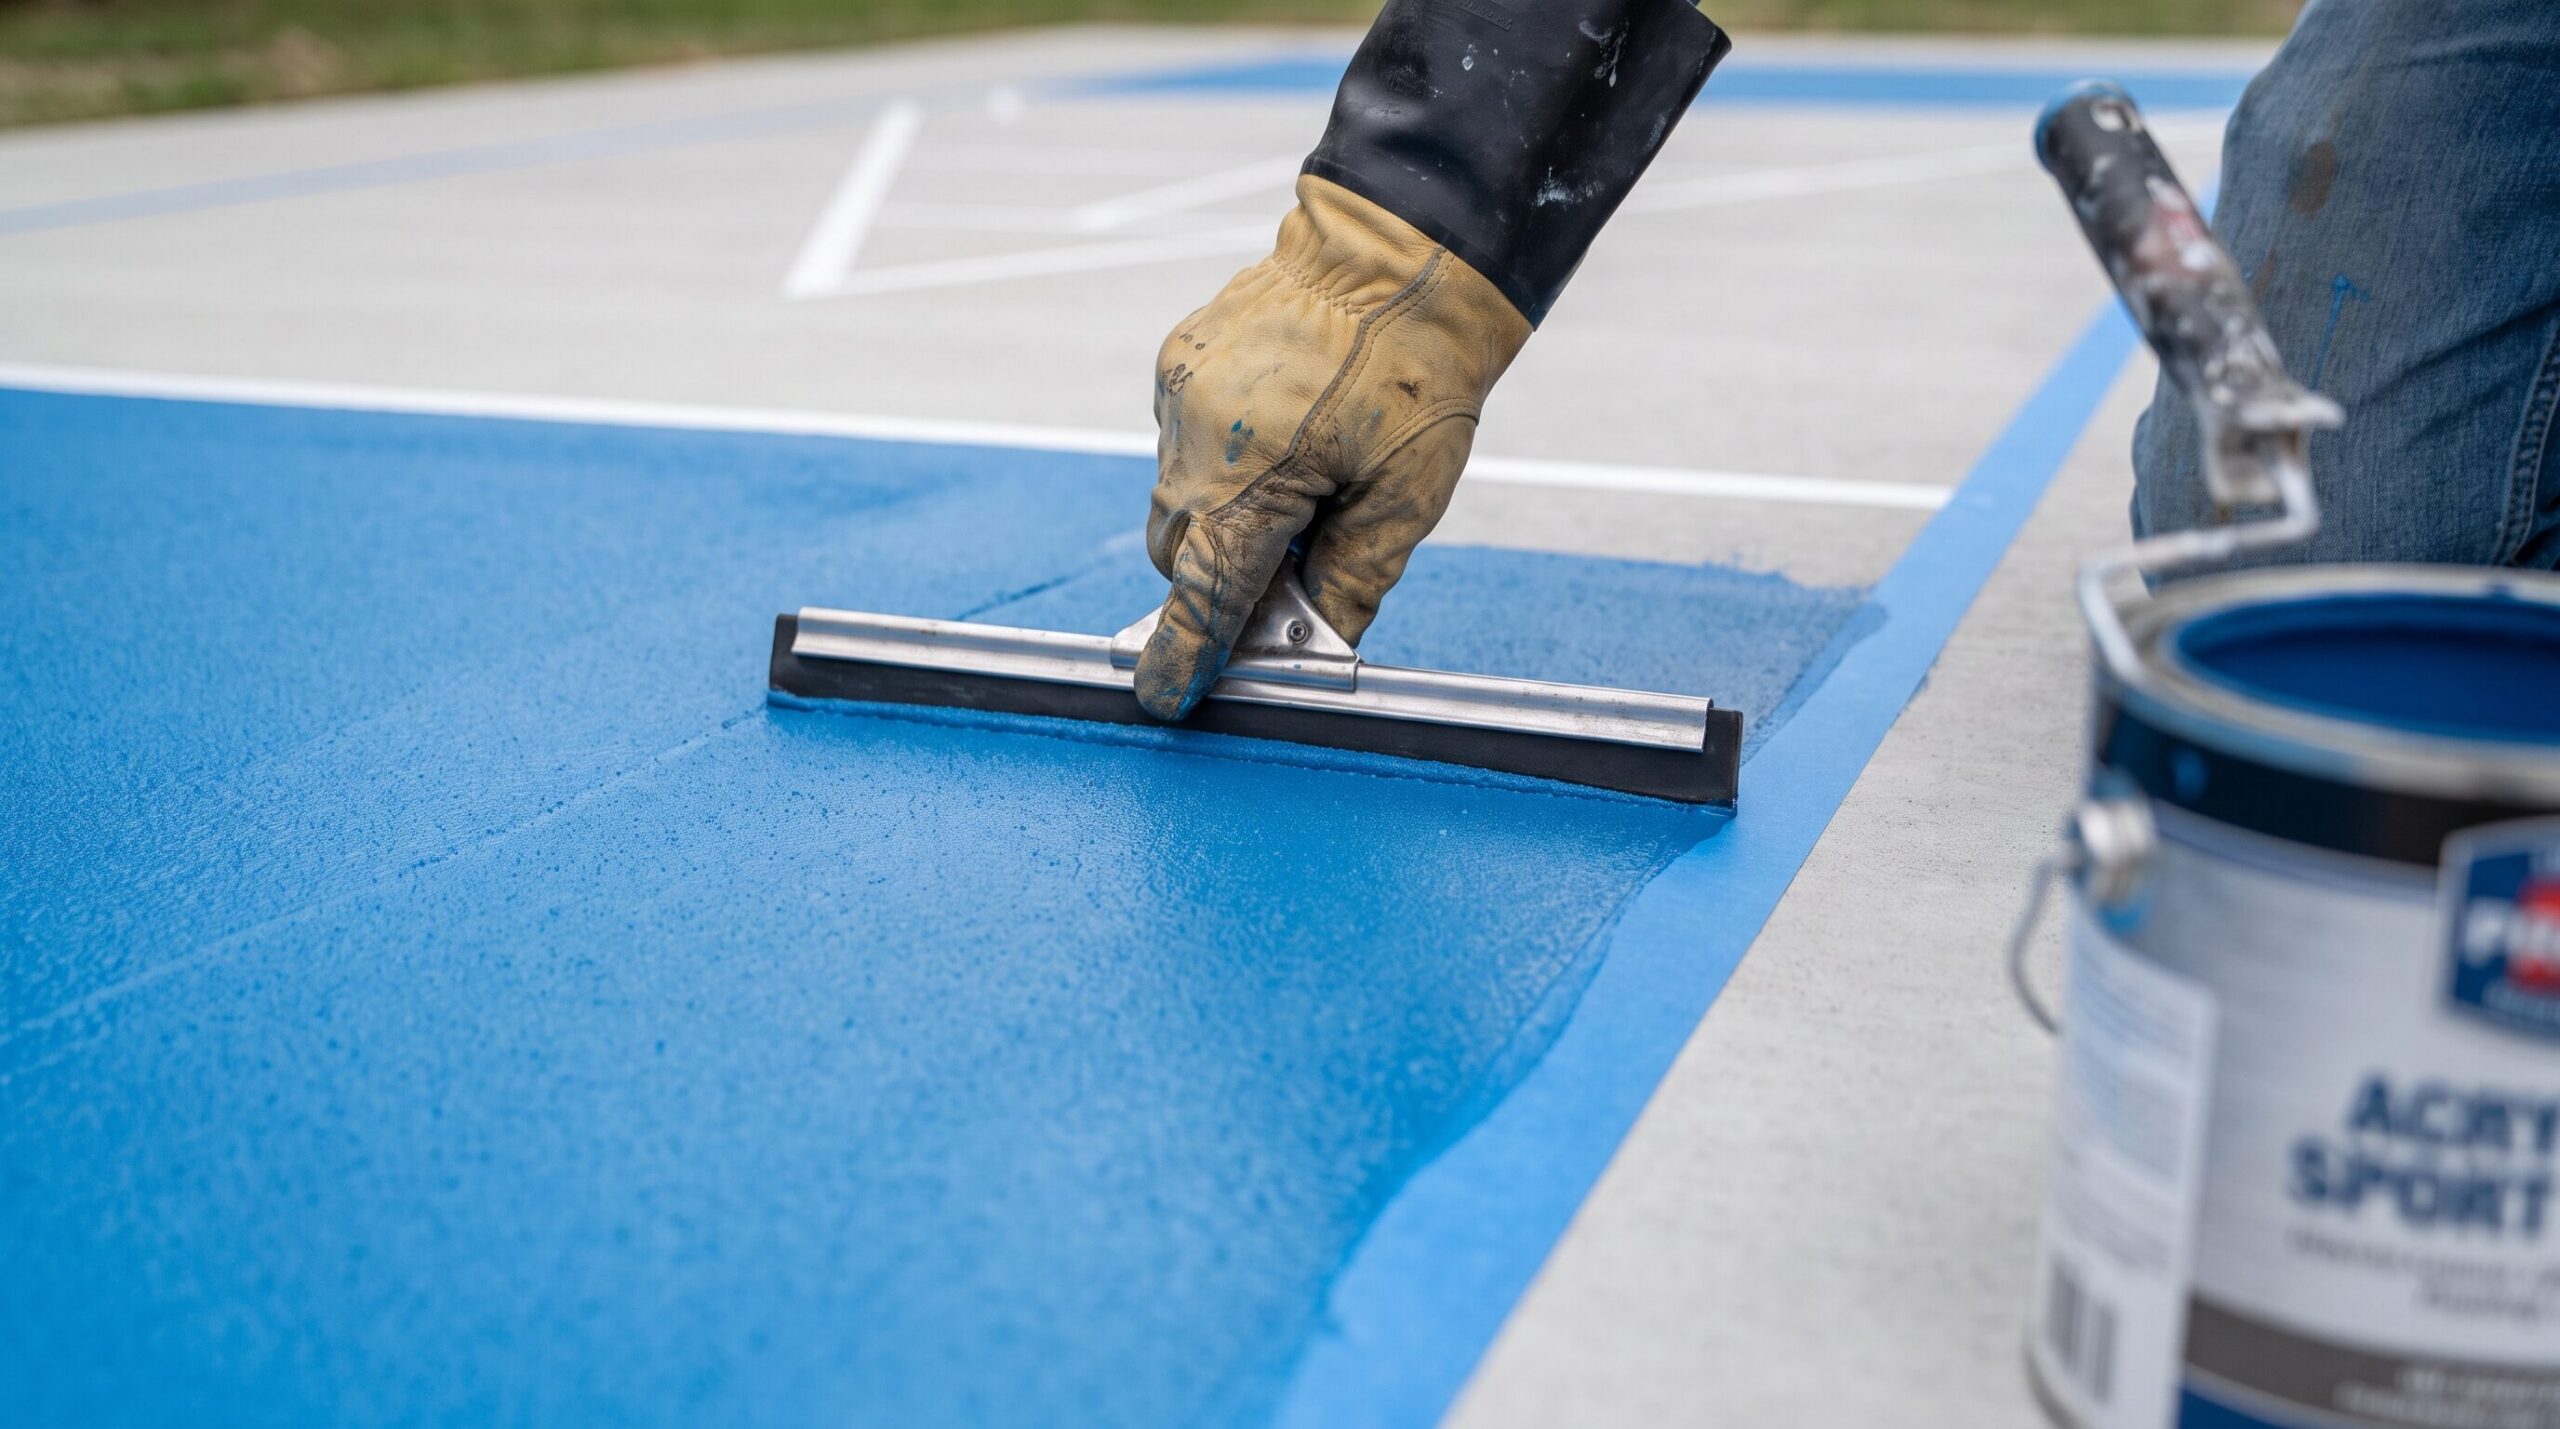
This is the standard for a permanent, professionally built court, and it is what CrowAll builds for shuffleboard the same way we approach an acrylic-coated tennis or basketball surface. A cured concrete slab gets several coats of textured acrylic coating, each one squeegeed and rolled on and allowed to dry before the next, building up a smooth but slightly textured playing surface with enough grip to control disc speed without slowing it down excessively. Colour and the painted scoring zones go on as part of the same finishing process, giving the court a clean, durable look that holds up to years of use with only occasional recoating.
Modular Interlocking Tile
Some manufacturers sell modular plastic tile systems designed to sit over an existing flat, compacted surface without a full concrete pour. These can work reasonably well as a lower-cost or semi-portable option, particularly indoors or on a surface that is already flat and stable, though they are a different product entirely from a poured and coated court, with different long-term durability, feel, and maintenance characteristics. Homeowners weighing that tradeoff against a permanent build should think about how the court will be used, since a poured and coated surface generally holds its playing characteristics and finish for far longer under regular outdoor use.
| Surface | Disc Glide | Typical Lifespan | Ongoing Maintenance |
|---|---|---|---|
| Poured concrete, acrylic coated | Smooth, consistent, tunable through coating texture | Longest of the common options with periodic recoating | Occasional resealing on a multi-year cycle |
| Modular interlocking tile | Depends on tile system and base flatness | Shorter, tile-dependent | Panel cleaning and occasional replacement |
| DIY unsealed concrete | Inconsistent, rough over time | Shortest before cracking or surface wear becomes an issue | Frequent patching and eventual full resurfacing |
Acrylic Coating, Colour, and Court Markings
The scoring layout is what makes a shuffleboard court instantly recognizable, and getting it accurate is not optional. The National Shuffleboard Association rules specify painted lines 3/4 to 1 inch wide, laid out to form the scoring triangles and the 10-off zone at each end, over the 6-by-40-foot green playing surface. Discs used in play are 6 inches in diameter, between 9/16 and 1 inch thick, and weigh roughly 15 ounces new, with cues capped at just over six feet in length, which is worth knowing when planning end-zone clearance and any surrounding seating.
Colour choice is mostly aesthetic beyond the functional scoring lines, and CrowAll works with facility owners to pick a palette that fits the surrounding property, whether that means matching an existing acrylic-coated court elsewhere on the property or choosing something that stands on its own. What matters more than the exact colour is that the finish coat has enough consistent texture to control disc speed predictably, since a surface that is too smooth sends discs sliding well past where a player intended, and one that is too rough drags them short.
Indoor vs. Outdoor Shuffleboard Courts
Most of the courts CrowAll builds are outdoor, poured-concrete installations, but shuffleboard also works well as an indoor amenity in a community centre, clubhouse, or covered patio space. An indoor court skips the freeze-thaw exposure entirely, which simplifies the base requirements somewhat, though the same slab thickness, reinforcement, and level tolerance still apply, since the game itself does not change indoors. What does change is the finish: indoor courts can use a slightly different coating formulation suited to a climate-controlled space, and lighting becomes more of a design decision than a practical necessity, since there is no need to plan around fading daylight the way an outdoor court does.
| Consideration | Outdoor Court | Indoor Court |
|---|---|---|
| Freeze-thaw exposure | Full Ontario winter exposure, base and drainage critical | None, simplifies subgrade requirements |
| Lighting | Needed for evening play, glare control matters | Built into the space, more of a design choice |
| Seasonal usability | Spring through fall in most of Ontario | Year-round |
| Coating exposure | UV, moisture, and temperature swings factor into coating choice | Stable climate, less coating wear |
Shuffleboard Court Construction Process, Step by Step
| Phase | What Happens |
|---|---|
| Site assessment and layout | Confirm court size, orientation, and clearances against the available site |
| Excavation and grading | Remove topsoil, laser-guided grading sets the finished cross-slope |
| Base compaction | Compacted granular base laid and tested for stability and drainage |
| Forming and reinforcement | Forms set to exact dimensions, steel reinforcement placed |
| Concrete pour and finishing | Slab poured, screeded to tolerance, and floated smooth |
| Curing period | Roughly three to four weeks before coating begins |
| Acrylic coating application | Multiple coats applied and dried in sequence |
| Line marking and scoring layout | Scoring triangles, 10-off zones, and borders painted to spec |
| Final walkthrough | Level check, finish inspection, and handover |
Cost Drivers for Shuffleboard Court Construction
Cost varies enough by site conditions, court size, and finish that a single number rarely means much without context specific to a property. What consistently moves the price are a handful of factors: how much excavation and grading the site needs before anything is built, whether existing drainage infrastructure is nearby or needs to be installed from scratch, the chosen court size and finish quality, and site access for equipment and concrete delivery. Our general cost breakdown for sports court installation and sports court landscaping cost guide cover these underlying drivers in more depth, since the same factors that move any court’s price apply to shuffleboard at a smaller physical footprint but with similarly tight finish tolerances.
| Driver | Why It Matters |
|---|---|
| Site prep and excavation | Sloped, rocky, or poorly draining sites need more work before the slab goes in |
| Court size and length | A full 52-foot court uses more concrete and coating than a compact build |
| Drainage infrastructure | New drain lines or tie-ins add cost but prevent long-term problems |
| Coating system and colour options | Multi-coat acrylic systems with custom colour cost more than a basic finish |
| Site access | Tight backyard access can require smaller equipment and more labour time |
Permits and Zoning Considerations in Ontario
Whether a shuffleboard court needs a building permit depends on the municipality, the court’s proximity to property lines, and how much grading or drainage work the project involves. A poured concrete slab is exactly the kind of hardscape project that some municipalities want reviewed, particularly where it affects grading or runoff onto a neighbouring property. Our guide on permits for sports court construction and our overview of zoning considerations for residential court installations both cover the questions worth raising with a local building department before finalizing a design, since the answer varies enough by municipality that checking early avoids a costly redesign later.
Best Time of Year to Build a Shuffleboard Court in Ontario
Late spring through fall offers the most stable window for excavation, grading, and concrete work in most of Ontario, for the same reasons that apply to any hard-surface court build. Frozen ground rules out new excavation in winter, and concrete needs temperatures well above freezing to cure properly, which is why CrowAll’s guidance on the best time of year to build a sports court and our comparison of summer versus fall construction timing apply just as directly to shuffleboard as to any other surface. Booking a build early in the season generally gives more flexibility on scheduling than waiting until late summer, when contractor calendars fill up quickly.
Maintenance and Long-Term Care
A properly built acrylic-coated shuffleboard court needs comparatively little upkeep, which is part of why the surface has stayed popular for decades in retirement communities and clubs that do not want a high-maintenance amenity. The coating does eventually wear from UV exposure and disc traffic, particularly in the heavily used scoring zones, and will need periodic recoating on a multi-year cycle to stay smooth and consistent. Our guides on the cost-benefit of professional court maintenance and maintaining a sports court in prime condition cover the general principles that apply here.
| Task | Frequency |
|---|---|
| Sweep debris and standing water off the surface | After each use, or weekly in season |
| Inspect for cracking, lifting, or coating wear | Start and end of each playing season |
| Clear gutters or drains along the court perimeter | Spring and fall |
| Recoat acrylic surface | Multi-year cycle, based on wear and inspection |
| Repaint scoring lines and zones | As needed, typically alongside recoating |
Common Mistakes to Avoid
Most of the problems CrowAll gets called to fix on shuffleboard courts trace back to the same handful of shortcuts. Skipping a proper compacted base is the biggest one, since it is invisible on installation day and only shows up once the ground settles unevenly underneath the slab. Coating the concrete before it has fully cured is another common issue, trapping moisture that surfaces later as peeling or bubbling. Ignoring cross-slope in favour of a perfectly flat pour causes standing water, which is worse for a concrete surface long-term than a properly engineered slope ever is. Our broader look at the top mistakes that damage sports courts covers several of these patterns in more depth, since they show up across almost every hard-surface build CrowAll sees, not just shuffleboard.
Combining Shuffleboard With Other Backyard Courts
Shuffleboard’s small footprint makes it a natural addition alongside other courts rather than a standalone project. Properties already planning a padel court, a bocce court, or a backyard ice rink for winter use often find shuffleboard fits into the same broader landscape plan with minimal added site work, since much of the grading, drainage, and access infrastructure is already being built for the larger project. Facilities layering multiple lower-impact sports, rather than a single large court, tend to get more consistent day-to-day use out of the property overall, since different groups gravitate to different games.
Accessibility Considerations
Shuffleboard’s appeal to a wide range of ages and mobility levels makes accessibility worth building in from the start rather than retrofitting later. A level, non-slip surface, clear sightlines from a seating area, and accessible pathways connecting the court to parking or a building entrance all matter more here than on a lot of higher-intensity sports surfaces, since shuffleboard specifically attracts players who might not use a full tennis or basketball court. Ontario’s Accessibility for Ontarians with Disabilities Act sets out the framework that community and commercial facility owners should keep in mind when planning amenity spaces, and it is a useful reference point even on a private residential build, where accessibility is simply good design.
Frequently Asked Questions
What are the official dimensions of a shuffleboard court?
The universal playing surface is 6 feet wide by 40 feet long, with the overall footprint including borders and walkways ranging up to 10 feet by 52 feet on the largest recognized layout, per the National Shuffleboard Association’s official rules.
How do I build a shuffleboard court?
A properly built court starts with excavation and laser-guided grading, followed by a compacted base, formed and reinforced concrete poured to a tight level tolerance, a full curing period, and then several coats of acrylic surfacing with the scoring zones painted to spec.
Can shuffleboard be played on concrete?
Yes, concrete finished with an acrylic coating system is the standard surface for a permanent shuffleboard court, giving a smooth, consistent glide that a raw or unsealed concrete surface cannot match.
What is the minimum size for a playable shuffleboard court?
A compact court as small as 3 feet wide by 28 feet long can work in a tight side yard or laneway, though the game plays closer to its intended feel on a court nearer the standard 6-by-40-foot scoring zone.
How much does it cost to build a shuffleboard court in Ontario?
Cost depends on site conditions, court size, and finish quality, so a single figure without site context rarely tells the full story. Our cost breakdown and sports court landscaping cost guides cover the underlying drivers in detail.
Does a shuffleboard court need to be perfectly flat?
No. It needs a slight, consistent cross-slope, typically around 1 percent, so water sheets off evenly. A perfectly flat pour tends to hold standing water, which causes more long-term problems than a properly engineered slope.
How long does it take to build a shuffleboard court?
A single residential court typically takes a few weeks from layout to finished surface once curing time is factored in, since the concrete needs roughly three to four weeks to cure before it can be coated.
Do I need a permit to build a shuffleboard court in Ontario?
Possibly, depending on the municipality, proximity to property lines, and the scope of grading involved. Checking with the local building department before finalizing a design is the safest approach.
What is the best surface finish for a shuffleboard court?
A multi-coat acrylic system over a properly cured concrete slab is the standard choice, since it gives a durable, consistent surface with enough texture to control disc speed without excessive maintenance.
Can an indoor space be converted into a shuffleboard court?
Yes, indoor courts follow the same slab thickness and level tolerance as outdoor courts, without the freeze-thaw exposure, and can use a coating formulation suited to a climate-controlled environment.
How thick does the concrete slab need to be?
Official specifications call for a 4-inch slab built in two layers, roughly 3.5 inches of reinforced structural concrete topped with a thinner finish coat, held to a tolerance of no more than 1/32 of an inch out of level across the court’s width.
What is the best time of year to build a shuffleboard court in Ontario?
Late spring through fall offers the most stable conditions for excavation, grading, and concrete curing. Frozen ground and near-freezing temperatures rule out reliable new construction in winter.
Can shuffleboard courts be combined with other backyard sports?
Yes, shuffleboard’s small footprint makes it a common addition alongside courts like bocce, padel, pickleball, or a backyard ice rink, often sharing the same grading and drainage work already planned for the larger project.
How much maintenance does a shuffleboard court need?
An acrylic-coated concrete court needs relatively little upkeep: regular sweeping, seasonal inspection, and periodic recoating on a multi-year cycle as the surface wears from UV exposure and use.
What causes a shuffleboard court to crack or heave?
Most cracking and heaving traces back to an improperly compacted base, inadequate drainage, or concrete that was not reinforced or cured correctly before coating, all of which are more forgiving mistakes on a wider surface than on a narrow shuffleboard court.
Are official discs and cues a factor in court design?
Regulation discs are 6 inches in diameter and roughly 15 ounces, with cues capped at just over six feet long, which is useful context when planning end-zone clearance and any nearby seating, though it does not change the core slab and coating specifications.
Does a shuffleboard court need lighting?
Not by default, but glare-controlled lighting extends usable evening play considerably, particularly given how early daylight fades in an Ontario fall, and it is a common add-on for courts that see regular evening use.
Plan Your Shuffleboard Court Construction With CrowAll
Shuffleboard looks simple on the surface, and in a lot of ways it is, but a court that stays level and plays true for decades still comes down to the same fundamentals as any other sports surface CrowAll builds: accurate grading, real drainage, and a base engineered for Ontario’s freeze-thaw climate rather than one that just looks finished on handover day. Book a consultation with CrowAll Surface Contractors to talk through your site and surface options, or browse our product catalogue to see the full range of surfaces we build. If shuffleboard is one piece of a bigger property plan, our why choose CrowAll page, our company profile, and our project gallery are good next stops.