Pickleball Court Construction in Ontario: Getting the Base, Grading and Surface Right
Most people who search for pickleball court construction already have a spot in mind. It might be the side yard that has been sitting empty, a worn tennis court at the club, or the corner of a school property. The question is rarely whether the court can be built. It is what has to happen under the surface, in what order, and when, so the court is still flat and playable after a few Ontario winters.
This guide walks through the whole build the way a court contractor would explain it to an owner: size and orientation, site selection, permits, excavation, the granular base, grading and drainage, asphalt or concrete, curing, acrylic surfacing, lines, nets, fencing, lighting and landscaping. It also covers cost drivers, seasonal timing and the mistakes that cause most callbacks. If you want the shorter version of a residential project first, our page on backyard pickleball court installation gives the overview.
What Pickleball Court Construction Involves
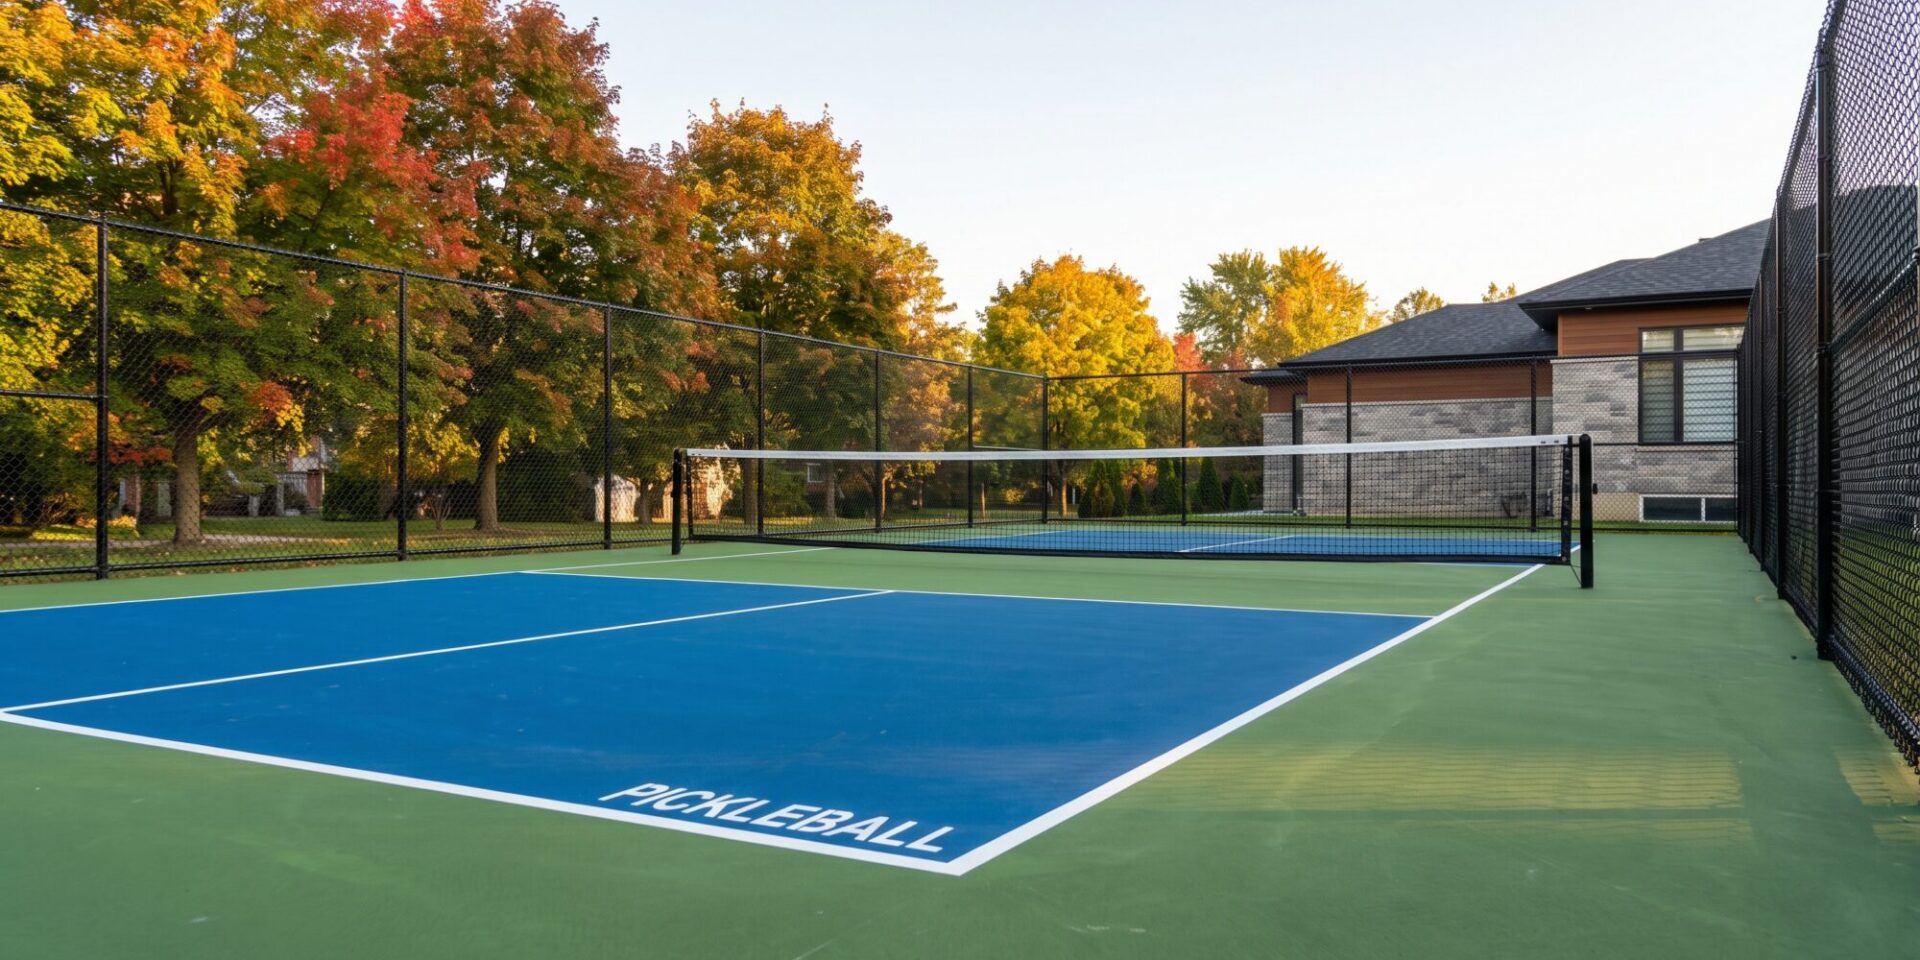
Pickleball court construction is the process of preparing a level, well-drained site, building a compacted base, placing an asphalt or concrete pad, applying an acrylic playing surface, and then adding lines, net posts, fencing and any lighting. Most of the cost and most of the risk sit in the ground work, not in the paint.
The Short Version of the Build Sequence
A new outdoor court normally moves through the same stages whatever the size: site assessment and permits, excavation, subgrade preparation, granular base, grading and drainage, pad (asphalt or concrete), curing, acrylic surfacing, line marking, then net posts, fencing and lighting. Some of those items, particularly net post footings, fence posts and light pole bases, are easier to build into the base than to cut in later. That is why a good contractor asks about fencing and lighting before the first shovel goes in, even when the owner only wants to start with a bare court.
Who This Applies To
Homeowners with private courts, clubs adding dedicated courts, schools, municipalities and condo or HOA-style communities all follow the same construction logic. What changes is scale, the permit route, accessibility needs, lighting and how many courts share a fence line. A single backyard court and an eight-court park facility differ mainly in drainage planning and approvals.
Planning the Court: Size, Orientation and Layout
Start with the footprint, because everything else, from excavation volume to fence cost, follows from it. USA Pickleball states that a regulation court measures 20 feet wide by 44 feet long and should be oriented north to south outdoors, so players are not looking straight into the low sun during morning or late afternoon play. You can read the full set of guidelines on USA Pickleball’s construction page.
The painted court is the smallest part of the pad. Players run past baselines and sidelines, so the paved area needs to be larger than the lines. A 2023 industry presentation on the updated USA Pickleball construction manual lists a recommended minimum of 30 by 60 feet per court, measured to the centre line of the fence posts. We cover the line layout in more detail in our guide to the size and dimensions of a pickleball court.
| Item | Figure | Source and Notes |
|---|---|---|
| Playing court | 20 ft wide by 44 ft long | USA Pickleball regulation size, same for singles and doubles |
| Non-volley zone | 7 ft from the net on each side | USA Pickleball, defined by a line parallel to the net |
| Net height | 36 in at the sidelines, 34 in at the centre | Pickleball Canada construction guidance |
| Recommended minimum pad per court | 30 ft by 60 ft | 2023 industry presentation on the USA Pickleball manual, measured to the fence post centre line |
| Orientation | Long axis north to south | USA Pickleball and Pickleball Canada, to limit sun glare; wind shelter also matters |
| Perimeter fence height | Minimum 3 ft, 6 ft recommended | Pickleball Canada construction guidance; many sites use taller fences, particularly near property lines |
One Court, Two Courts or a Shared Pad
Two or more pickleball courts can share one fenced pad, and several fit on the area of a single tennis court. Our article on converting a tennis court into a pickleball court explains how that layout works. If you want pickleball and another sport on the same surface, the multi-sport court construction guide covers the line, net and footprint trade-offs.
Multiple courts add details a single court does not need. Courts built side by side typically need a ball barrier or divider between them so stray balls do not run through the next game, and you will want to decide early where the gates, benches and paths go.
Choosing the Right Site
Site conditions decide how much money goes underground. A flat, dry, open lot with good access costs far less to prepare than a sloped lot with fill, mature trees and a high water table. Walk the site after a hard rain before you commit, because standing water tells you more than any drawing.
Sun, Wind and Shade
North to south orientation handles the sun for most players, but wind matters too. Pickleball Canada’s guidance mentions wind shelter, particularly from the north and west. A windbreak of fence screening or planting is far easier to plan now than to add after the first complaints about wind pushing the ball around. Be careful with trees too. Leaves, pollen, sap and root systems all end up on or under the court, so a court tucked right under a large tree will need more cleaning and may suffer root heave over time.
Drainage, Soil and Frost
Water is the main enemy of any outdoor court in Ontario. Look at where surface water currently flows, what the soil is (clay holds water, sand drains), whether a swale, ditch or sewer sits nearby, and where the water will go once a large impermeable pad replaces lawn. Frost depth matters as well. Freezing water in a weak base lifts and cracks a pad, which is why the granular base section below is not an item to trim. Our guide to drainage in sports surface construction goes deeper on what to look for.
Access, Utilities and Neighbours
Excavators, dump trucks, paving equipment and concrete trucks need a route in. A narrow side gate that blocks machinery pushes work to hand labour and raises cost. Check for buried gas, hydro, water, septic fields and drains before design is finalized. Then think about the neighbours. Pickleball has a sharp sound, and distance, fence design and landscaping all help. Our article on pickleball court noise in Ontario explains how to site a court so it does not become a problem.
Permits, Zoning and Approvals in Ontario
Requirements vary by municipality, and a private court is often treated differently from a club or park court. The usual items to check are zoning and accessory structure rules, setbacks from property lines, lot coverage and impervious surface limits, fence height limits, lighting rules, tree protection by-laws and, near rivers, ravines or wetlands, conservation authority approval. HOA and condo rules can add their own limits.
Ask early, in writing, and keep the answers. Our article on whether you need permits to build a sports court lists the questions to put to your municipality. A contractor can help with the technical drawings, but the permit decision is the owner’s responsibility, and starting work before it is confirmed is where projects stall.
Step-by-Step: How a Pickleball Court Gets Built
The sequence below is how most contractors approach a new outdoor court. Specific depths and slopes change with soil, drainage and the governing specification, so treat the numbers as published guidance rather than a drawing for your lot.
Step 1: Site Assessment and Layout
The contractor reviews the lot, soil conditions, existing grades, drainage paths, access and utilities, then lays out the pad. Surveying the corners and elevations before digging prevents the common problem of a court that ends up a few inches out of square or sitting too low for its drainage outlet. This is also when fence lines, gates, lighting poles and net post positions get fixed on the plan.
Step 2: Clearing and Excavation
Topsoil, sod, roots and organic material come out, because they decay and settle. The excavation goes down to the depth needed for the base and pad, plus allowance for drainage. Soft spots found at this stage are cut out and replaced with compacted material. Skipping that step is one of the most reliable ways to get a settled or cracked court later.
Step 3: Subgrade Preparation and Geotextile
The exposed subgrade is shaped and compacted. Pickleball Canada’s construction guidance, published through Pickleball Manitoba, recommends covering the excavation with a geotextile fabric before the granular sub base goes in, which keeps the stone separate from the soil below. You can read that guidance on the Pickleball Canada construction page.
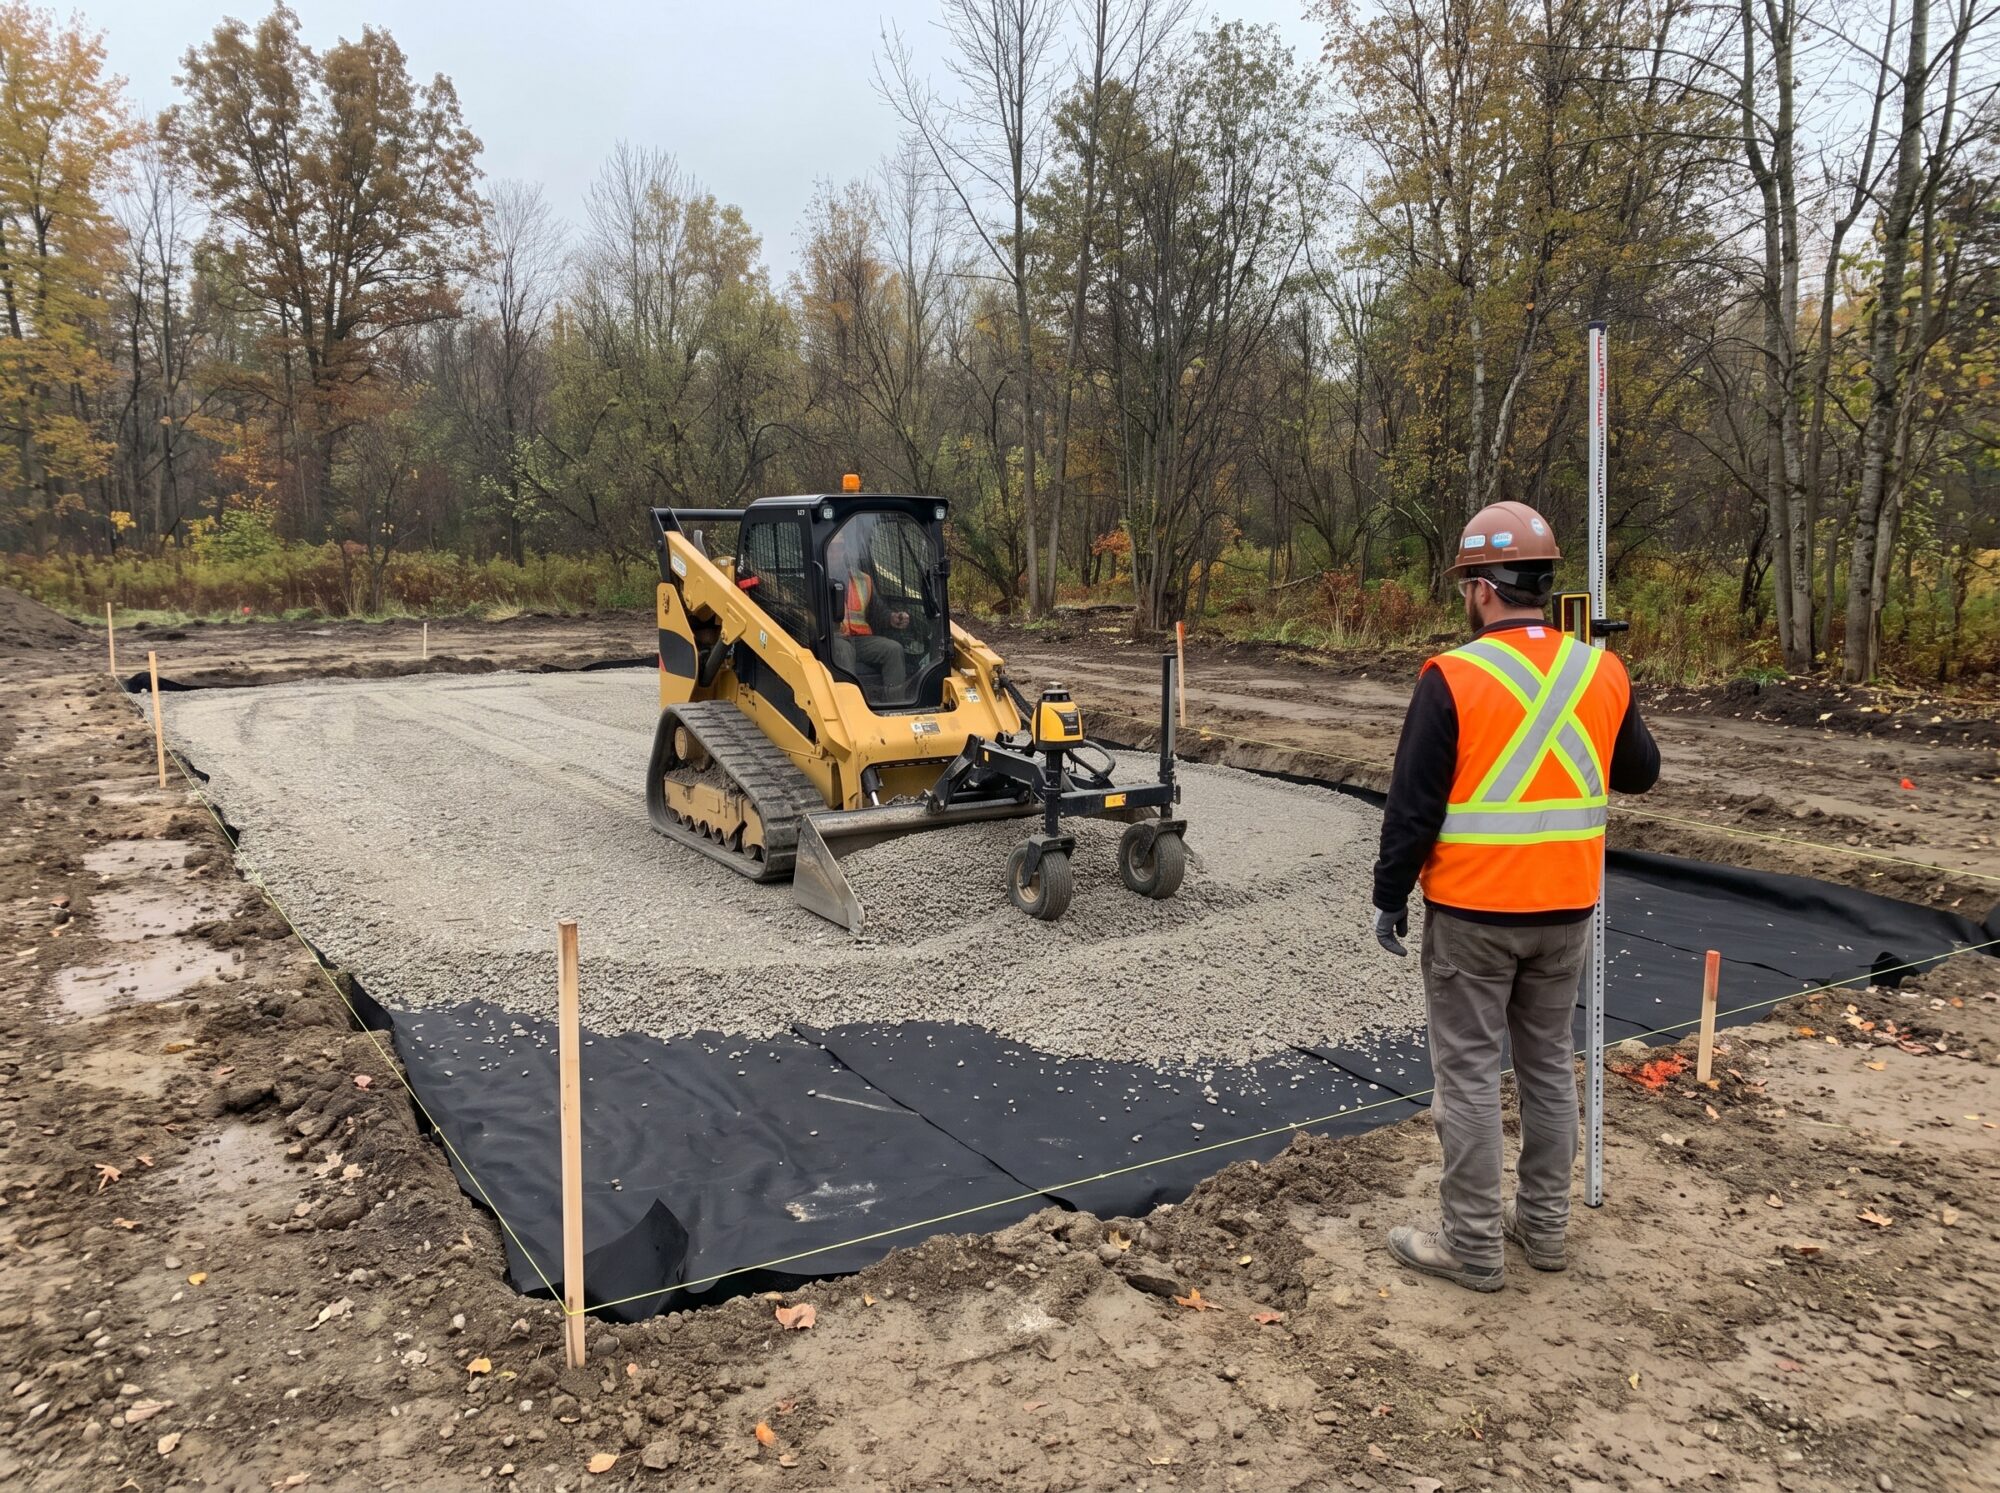
Step 4: Compacted Granular Base
The granular base is the structural bed under the pad. For frost zones, the same Pickleball Canada guidance recommends a depth of 18 inches with a minimum of 15 inches of compacted granular material. A 2023 industry presentation on the updated USA Pickleball manual lists base stone in the range of 6 to 8 inches for asphalt courts. Those two figures describe different climates and different design assumptions, which is a good illustration of why the base depth for your site should come from the project engineer or contractor and not from a general article. In southern Ontario, with deep frost and freeze-thaw cycling, a thin base is a gamble.
The stone goes down in lifts, each compacted, with attention to moisture content so it reaches density. A good base is uniform. Variation in thickness or compaction shows up later as low spots, ponding and cracks.
Step 5: Grading, Slope and Drainage
A pickleball court must shed water without feeling sloped to players. Published slope guidance differs. Many contractor specifications call for about one percent in a single direction, roughly an inch in ten feet, while the 2023 manual summary lists flatter slopes for some fast-drying surface systems. The number on your drawing should match the engineer’s design and the coating manufacturer’s requirements.
Laser control is how a contractor holds those numbers. CrowAll uses a laser-guided grading process to direct water while keeping the playing surface even, which you can read about on our laser guided grading page and in the article on what to expect from laser-guided grading. For why the numbers matter, see the importance of accurate grading for sports court drainage.
Beyond the court itself, water needs somewhere to go. That might mean a perimeter swale, a French drain, a catch basin tied to a storm connection, or a graded outfall to a safe discharge point. Directing runoff onto a neighbour’s property is a bad idea and may break local rules.
Step 6: Net Post Footings, Fence Posts and Lighting Bases
Anything that needs a footing is easier to place before the pad goes down. Pickleball Canada’s guidance describes two net approaches: a cast-in-place reinforced concrete pile below the playing surface placed before the granular base goes in, or a portable net over the finished surface. Permanent posts give a cleaner look and consistent net height. Portable systems let you use the pad for other things. Our article on tennis court net systems covers post types and installation, which apply closely to pickleball.
Fence posts and light pole foundations follow the same logic. If you might add lights in two years, run conduit and set the bases now. Digging through a finished pad to add them later damages the surface you paid for.
Step 7: Placing the Pad
The pad is either asphalt or concrete, and the choice affects cost, surface prep and long-term maintenance. The table below compares them using published guidance and what contractors commonly report. Specific thicknesses vary by specification, so confirm against your project’s design.
| Factor | Asphalt | Conventional Concrete | Post-Tensioned Concrete |
|---|---|---|---|
| Typical structure | Sport mix asphalt over compacted stone; Pickleball Canada guidance lists a minimum of 3 in of sport mix asphalt | Reinforced slab over compacted stone, often with a vapour barrier below | Slab with steel cables tensioned after the concrete cures, which is meant to limit shrinkage cracking |
| Upfront cost | Often lower for the pad itself | Often higher than asphalt | Usually the highest of the three |
| Flexibility | Flexes slightly with movement but can crack where water gets in and freezes | Rigid; needs correct joints and base | Rigid, with fewer joints |
| Cure before coating | One US surfacer cited about 14 days | The same source cited about 28 days | Follow the engineer and coating manufacturer |
| Best fit | Budget-conscious residential and park courts with strong drainage | Owners who want a rigid, long-life slab and accept the higher first cost | Sites with poor soils or owners prioritizing crack control |
CrowAll’s pickleball page describes asphalt, concrete and modular tile options. Our article on the benefits of soft asphalt in tennis court installation explains how a softer asphalt mix behaves, and the comparison applies to pickleball too.
Whichever pad you pick, it has to be built as a court. A slab poured like a patio, with the wrong finish, no vapour barrier or poorly placed control joints, ends up with seams and patches that wear faster than the rest of the surface. A surfacer quoted in a US pickleball retailer’s guide put it bluntly: it has to be poured specifically as a court. A medium broom finish is a common request for concrete so the coating has something to grip.
Step 8: Curing
Fresh concrete and asphalt need time before coating. The same retailer’s guide quotes about 28 days for concrete and about 14 days for asphalt before a surfacing crew starts. Treat those as ballpark numbers. The real answer depends on mix, thickness, weather and the surfacing manufacturer’s rules, and a coating applied over a slab that is still releasing moisture can blister. In Ontario, that cure window is also why court projects need to be sequenced against the season. See our guides on the best time of year to build a sports court and summer versus fall timing.
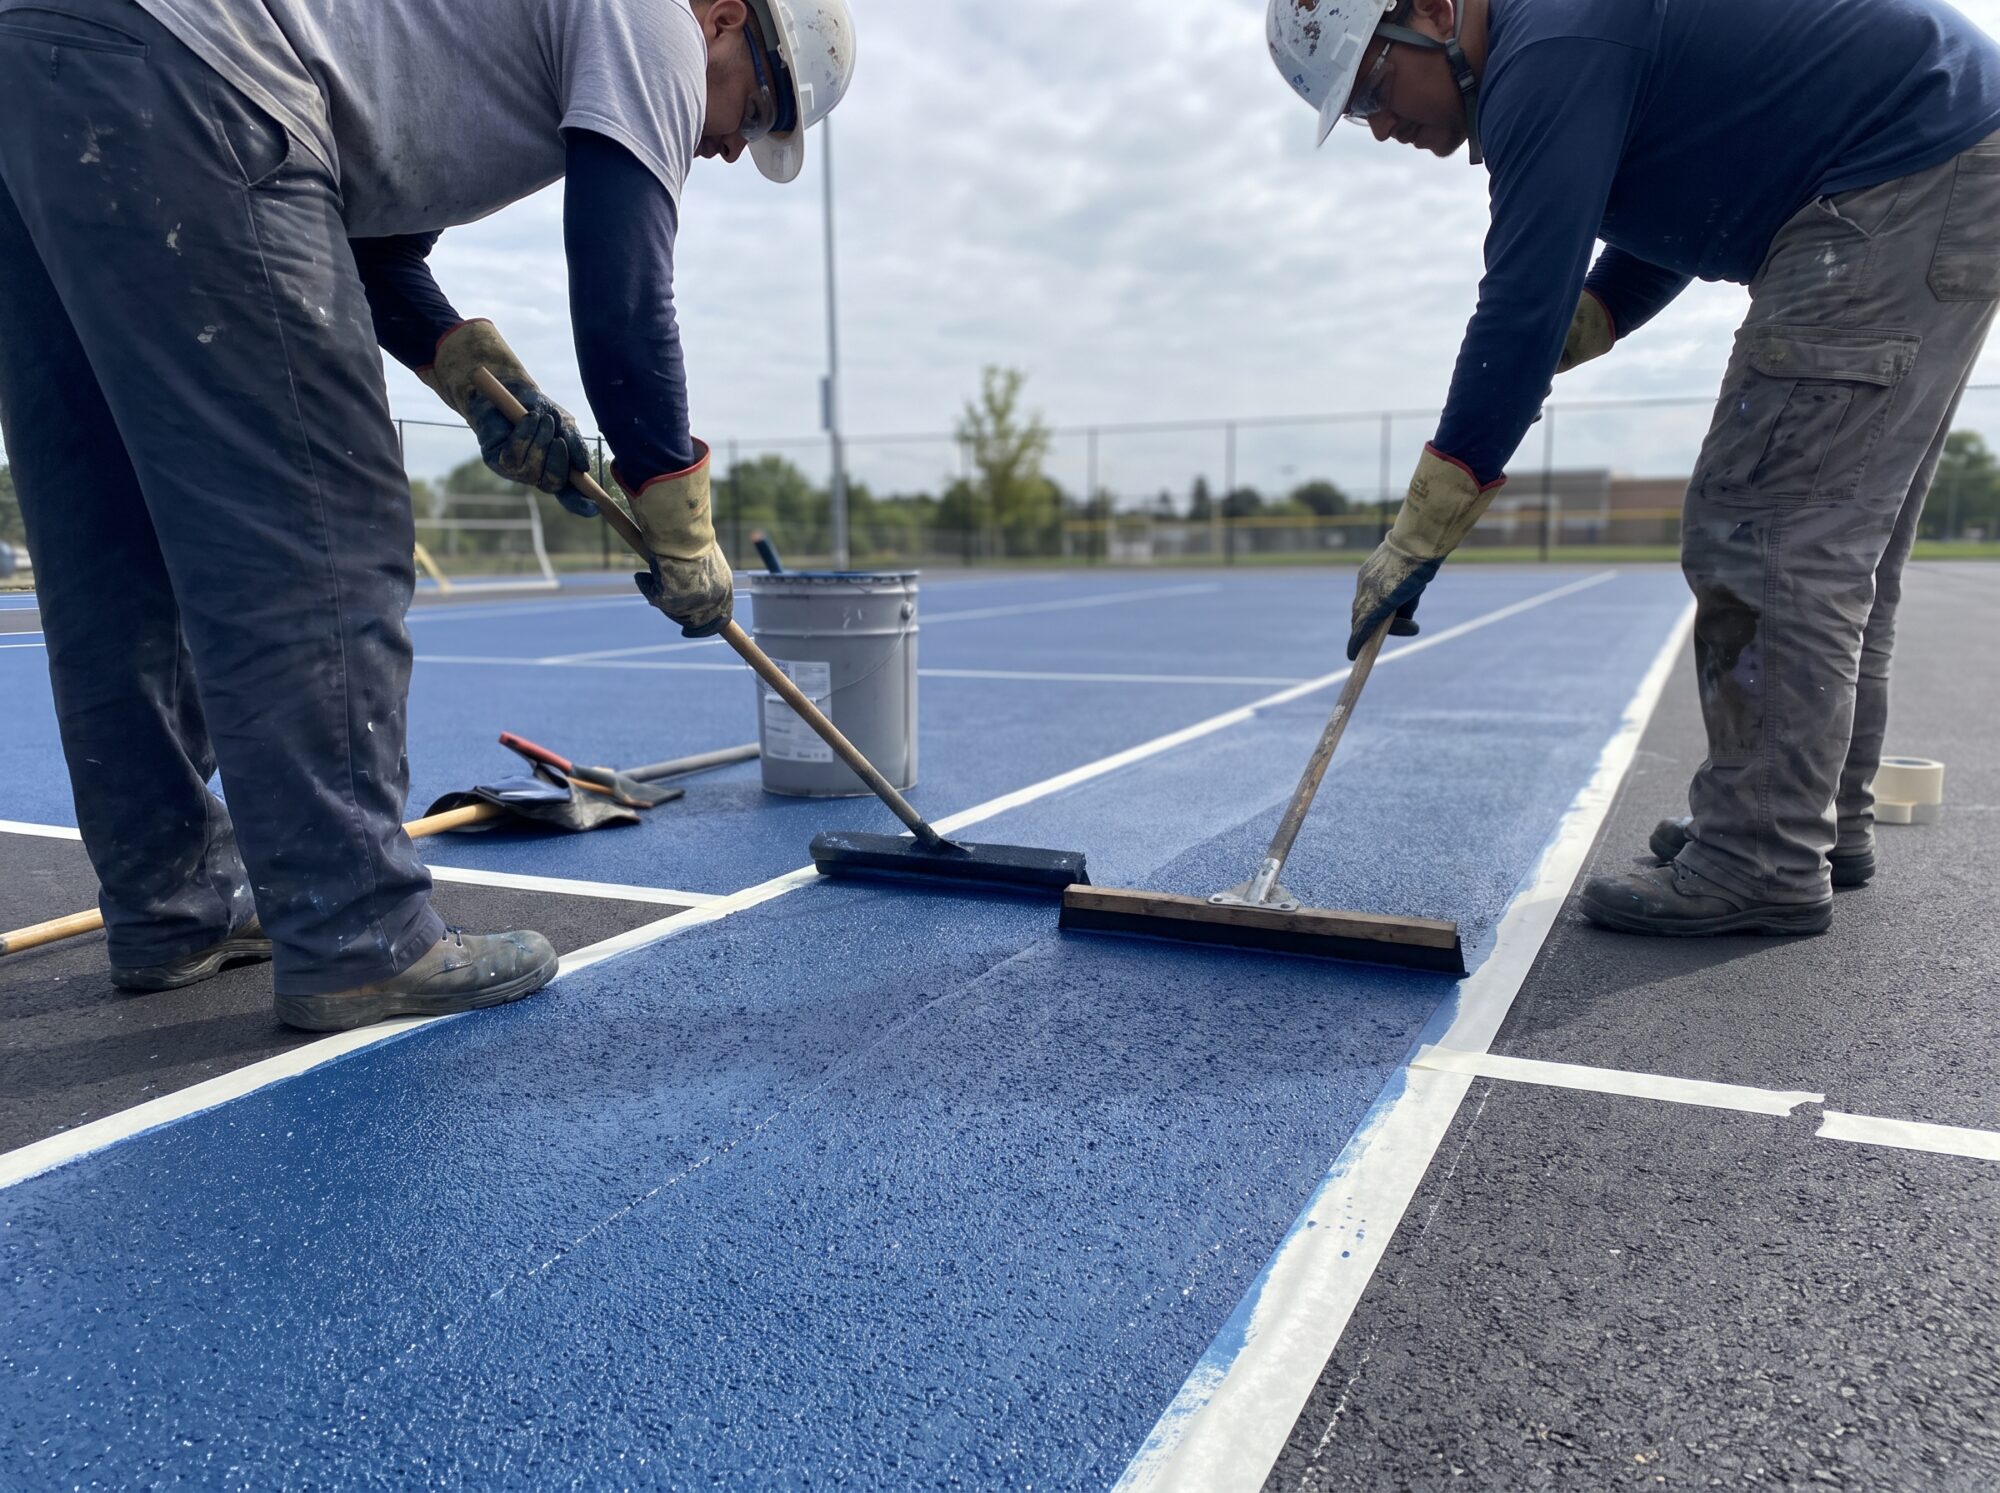
Step 9: Acrylic Surfacing
Acrylic surfacing is what turns a pad into a pickleball court. It usually involves patching and filling low spots, a resurfacer coat to even the texture, one or more colour coats with fine aggregate for traction, and sometimes cushion layers. Coating makers publish their own system specifications, and the SportMaster site, for example, describes a standard cushion system built from resurfacer, rubber-filled cushion coats and finishing colour coats. Those layers, texture and cushion are described in the manufacturer’s literature, and a contractor should follow whichever system the owner selects.
Weather decides the schedule. Acrylic coatings need dry conditions and decent temperatures and sun to cure. One surfacer quoted in the retailer’s guide said he schedules the second coat in the morning so the sun reaches the whole court. If you want to understand how coatings affect durability and appearance, read our piece on acrylic sports court coating.
| Surface System | What It Is | Considerations |
|---|---|---|
| Standard acrylic colour system | Resurfacer plus pigmented acrylic coats with fine sand for texture | Firm, consistent bounce and straightforward upkeep; the usual starting point |
| Cushioned acrylic system | Rubber-filled cushion coats under the colour coats | Manufacturers promote joint-friendly play; costs more and adds coats |
| Modular tile | Interlocking tiles over a prepared base | Described by CrowAll as offering good drainage and reduced slip risk; ball bounce differs from acrylic |
| Shared multi-sport surface | Acrylic with separate coloured line sets for each sport | Efficient use of space; line clarity needs planning |
Colour is more than aesthetics. High-contrast lines, a darker out-of-bounds area and a lighter court can help players track the ball. Our guide to sport court colour options in Ontario shows common combinations.
Step 10: Line Marking
Lines go on after the colour coats cure. Careful layout matters because a few inches of error show up in every rally. Crisp edges come from masking and primer, and USA Pickleball’s published court size and the 7-foot non-volley zone set the layout. Contractors often mark the layout with string and chalk first, check the diagonals and only then paint. For tennis court overlays and shared lines, a layout plan prevents the confusion of too many lines.
Step 11: Nets, Fencing and Gates
Nets go up once the surface has cured. For fencing, Pickleball Canada’s guidance lists a minimum height of 3 feet with 6 feet recommended around the playing surface. Many private and public courts go taller, since stray balls and neighbour sightlines both argue for it. Our article on tennis court fencing materials, height and maintenance explains the options, and most of it carries over directly to pickleball enclosures.
Step 12: Lighting
Lighting extends the season and the evening, but it triggers its own rules on glare, spill and hours. The 2023 manual summary lists outdoor court lighting at roughly 3800K to 5000K colour temperature. Our sport court lighting guide goes through LED systems, pole placement and neighbour considerations.
Step 13: Landscaping and Finishing
Plantings, screening, paths and seating finish the project. Good landscaping does more than look nice, since it helps with wind, screening and the way a court sits in the yard. CrowAll offers landscaping design alongside court work, and our article on sport court landscaping and where to start helps you plan.
Ontario Climate: Building for Freeze-Thaw
Most of the guidance written about pickleball courts comes from warmer states, so Ontario owners need to read it with the climate in mind. Water gets into small cracks, freezes, expands and widens them. Repeated over a winter, that is how a hairline crack turns into a trip hazard. Asphalt courts are especially dependent on drainage, since water that enters cracks and freezes accelerates failure.
What That Means for Design
The practical answers are a deep, well-compacted, free-draining base, a pad sloped so water leaves quickly, joints and edges that are sealed, and a maintenance routine that fixes cracks early. Our article on weather-resistant sports courts covers climate considerations in more detail, and our guide to sport court crack repair in Ontario shows how repairs are done when something does open up.
Winter Use and Snow
Plan for snow removal. Metal shovels and salt can damage an acrylic surface, so decide who clears snow and with what before the first storm. Some owners simply close the court for the winter. Others clear it with plastic-edged tools. Either approach works as long as it is deliberate.
Construction Phases at a Glance
The table below summarizes the order of work and what each phase is protecting against. It is a general sequence and individual projects differ.
| Phase | What Happens | What It Prevents |
|---|---|---|
| Planning and permits | Survey, layout, municipal approvals, utility locates | Stop-work orders, relocated courts, hit utilities |
| Excavation and subgrade | Strip organics, cut to depth, compact, replace soft spots | Settlement and uneven cracking |
| Geotextile and granular base | Fabric, then stone placed and compacted in lifts | Frost heave, base contamination, soft spots |
| Grading and drainage | Laser-controlled slope, swales or drains, outfall | Ponding, ice patches, wet edges |
| Footings and conduit | Net, fence and light foundations, buried power conduit | Cutting into a finished surface later |
| Pad placement | Asphalt paving or concrete placement and finishing | Weak seams, bird baths, surface defects |
| Curing | Waiting period set by material and manufacturer | Coating blisters and adhesion failure |
| Surfacing and lines | Patching, resurfacer, colour coats, line marking | Slippery or uneven play, visible defects |
| Nets, fence, lights, landscaping | Final installation and site restoration | Loose posts, glare, runoff onto the court |
What Drives Pickleball Court Construction Cost
Prices depend on the site, so any single number published online is more of a guess than an estimate. CrowAll inspects the site before quoting. For a sense of ranges and line items, our articles on how much it costs to build a pickleball court and pickleball court costs in Toronto go through the numbers, and comparing outdoor and indoor pickleball court costs covers the indoor question.
| Cost Driver | Why It Moves the Price | How to Control It |
|---|---|---|
| Site conditions | Slopes, poor soil, trees, fill and rock change excavation and base work | Pick the flattest, driest, most accessible spot |
| Number of courts and pad size | More area means more excavation, stone, paving and coating | Size to the actual number of players, with room to expand |
| Pad type | Asphalt, concrete and post-tensioned concrete carry different upfront costs | Weigh first cost against repair cycles |
| Drainage and grading | Drains, swales and outfalls add materials and labour | Plan drainage first; fixing it later costs more |
| Surface system | Cushion coats and modular tile cost more than a standard acrylic system | Choose for how you will really play |
| Fencing, gates and screening | Taller fences, windscreens and ball barriers add materials and posts | Match height to the site, not a guess |
| Lighting | Poles, bases, fixtures, electrical work and permits | Run conduit now even if you add lights later |
| Timing | Weather delays and seasonal schedules affect crews and curing | Book early and plan around cure times |
How Long Does Construction Take?
The honest answer depends on the pad type, the weather and permit timing. The ground work and pad can go quickly on a good site, but cure time and acrylic surfacing depend on weather, and no responsible contractor will promise a date before seeing the site. Our article on how long sports court construction takes breaks down the timeline, and the construction process for a backyard sports court explains the order of work.
If you want to play next summer, start the conversation in fall or winter. Permits, design and booking a crew take time, and spring schedules fill early. Starting in the cold season does not mean digging in frozen ground. It means getting approvals and a place in the queue so work can start when the ground and weather allow.
Customizing the Court
Owners often want something beyond the standard rectangle. That might be a custom colour scheme, a logo, a different fence style, a practice wall or a space shared with another sport. Our article on whether pickleball courts can be customized lists what is possible. Decide customizations early, since changes after paving cost much more than changes on the drawing.
Caring for a New Court
A new court is not maintenance free. Sweep or blow off debris, clear leaves before they stain, keep gutters and downspouts from discharging onto the surface, and watch for the first small cracks. Washing and repainting lines are normal items over time. CrowAll’s pickleball page lists maintenance services such as surface cleaning and line repainting. Our guides on keeping a sports court in prime condition and resurfacing a backyard pickleball court cover routines and what to expect over the years.
Common Construction Mistakes to Avoid
| Mistake | What Goes Wrong | Better Approach |
|---|---|---|
| Thin or uncompacted base | Settling, frost heave and cracks within a few winters | Build the base to the depth the engineer or contractor specifies for Ontario frost |
| Pouring the slab like a patio | Wrong finish, joints and seams that need patching before coating | Have the surfacer and slab contractor agree on specifications first |
| Ignoring drainage beyond the court | Water ponds at the edge, floods a neighbour or undermines the base | Plan the outfall as part of the court |
| Coating too soon | Blisters, poor adhesion and discoloration | Respect cure times and manufacturer instructions |
| Wrong orientation | Sun glare for players and awkward wind exposure | Orient north to south where the lot allows |
| Cutting into the finished pad for lights or posts | Visible patches and weak spots | Place footings and conduit before the pad |
| Skipping permit checks | Orders to stop, modify or remove work | Confirm zoning, setbacks and approvals in writing |
How to Choose a Pickleball Court Builder in Ontario
Because the important work ends up buried, builder selection matters more here than for most outdoor projects. Ask each contractor for the same information so quotes can be compared fairly.
| Question | What a Good Answer Includes |
|---|---|
| What base depth and material will you use, and why? | A stated depth, compaction method and reasoning tied to frost and soil |
| How will you control the slope? | Laser or equivalent grade control and a stated slope target |
| What happens to the water? | A drainage plan that includes the outfall, not just the court |
| Which surface system and manufacturer will you use? | A named system, number of coats and manufacturer instructions |
| What is included and excluded? | Itemized scope covering fencing, nets, lighting conduit and restoration |
| Who handles permits and utility locates? | A clear split of responsibilities |
| What warranty applies? | Written terms, with what is covered and for how long |
| Can I see comparable finished courts? | Photos or references from projects of similar scope |
Our article on tips for hiring a tennis court construction company in Toronto goes further on vetting contractors, and the same questions apply to pickleball. You can also browse our project gallery and read why clients choose CrowAll.
Planning a Pickleball Court With CrowAll
CrowAll builds pickleball courts across Ontario, including the Toronto area, and handles the work that sits underneath the surface: ground preparation, excavation, foundation, laser-guided grading and drainage planning, followed by surfacing, line marking and finishing. The company states that its work carries a warranty on workmanship and materials, and its pickleball page describes asphalt, concrete and modular tile options along with custom lighting, fencing and colours.
If you are weighing a site, a pad type or a budget, contact CrowAll to arrange a free consultation and quote. Bring a rough sketch of the property, a sense of how many courts you want and any photos of the proposed area. You can also see local details on our Toronto pickleball court construction page or review the product catalogue for court types.
FAQ
What is the best way to build a pickleball court?
Build it on a level, well-drained site with a deep compacted granular base, a properly graded asphalt or concrete pad, a cured acrylic surface, accurate lines and a net system set in footings. In Ontario, base depth and drainage matter most because of freeze-thaw.
How big does a pickleball court need to be?
The playing court is 20 feet by 44 feet. A recommended minimum pad per court is 30 feet by 60 feet, measured to the fence post centre line, so players have room to move beyond the lines.
Which direction should a pickleball court face?
USA Pickleball recommends orienting the long axis north to south outdoors so players are not looking straight into the sun in the morning or late afternoon.
How much does it cost to build a pickleball court in Ontario?
It depends on site conditions, number of courts, pad type, surface system, fencing and lighting. A site visit is the only reliable way to get a number, and our cost articles list the factors in detail.
Is asphalt or concrete better for a pickleball court?
Asphalt usually costs less up front and flexes slightly, while concrete is rigid and can last a long time when built correctly. Post-tensioned concrete aims to reduce cracking. The right choice depends on soil, drainage, budget and how long you want to go between repairs.
How thick should the base be?
Published figures differ. Pickleball Canada’s guidance for frost zones recommends 18 inches of compacted granular material with a minimum of 15 inches, while a 2023 industry summary lists 6 to 8 inches of base stone for asphalt courts. Your contractor or engineer should set the depth for your site.
What slope should a pickleball court have?
Many specifications use about one percent in one direction, roughly an inch in ten feet, though some surface systems list flatter slopes. Follow the design and the coating manufacturer’s requirements.
How long does concrete or asphalt need to cure before coating?
One US surfacer cited roughly 28 days for concrete and 14 days for asphalt. Actual timing depends on the mix, weather and the coating manufacturer’s instructions.
Do I need a permit to build a pickleball court in Ontario?
Often something is required, such as zoning compliance, setbacks, lot coverage limits, fence or lighting approvals, and conservation authority permission near regulated areas. Rules vary by municipality, so ask yours before work starts.
How long does it take to build a pickleball court?
Ground work and paving can move quickly on a good site, but cure time, surfacing and weather add to the schedule. A contractor can give a realistic window after seeing the property.
Can I build a pickleball court myself?
You can mark lines or add a portable net on an existing pad, but building a new court involves excavation, base work, grading, paving and coating. Most owners hire a contractor so the court is built to hold up through Ontario winters.
What surface is best for pickleball?
Acrylic coatings on asphalt or concrete are the most common outdoor choice. Cushioned acrylic and modular tile are alternatives for owners who want a softer feel or different drainage characteristics.
What is the cheapest way to build a pickleball court?
The lowest-cost route is usually adding lines and a portable net to an existing, sound pad, or resurfacing an old court. A new court built to last has fixed minimum costs in excavation, base and paving.
Do I need fencing around a pickleball court?
Fencing is strongly recommended. Pickleball Canada’s guidance lists a minimum of 3 feet with 6 feet recommended around the playing surface, and many sites use taller fences to control balls and sightlines.
Can I add lighting later?
Yes, but it is far cheaper to place conduit and pole bases during construction. Cutting into a finished pad leaves visible patches.
Can a tennis court be converted to pickleball courts?
Yes. One tennis court can often hold several pickleball courts when the surface and fencing are in good shape. Check our conversion guide for the layout and net considerations.
Does CrowAll build pickleball courts?
Yes. CrowAll builds pickleball courts in Toronto and across Ontario, with ground preparation, laser-guided grading, drainage planning, surfacing, line marking and finishing, and offers free consultations and quotes.